Reviews
Last updated September 23, 2025
The Reviews section gives users the ability to receive, review, and respond to ratings/reviews online.
The filters at the top allow you to narrow your search down to specific types of reviews (I.E. high/low ratings, specific platforms, order value)
Inbox
The inbox tab is your command center for responding to customer reviews. Here, you can view and reply to each review. You'll see that if you've set up Templates, AI generated responses are populated and ready to send! Check out the Configuring Review Templates help page to best assist!

All Reviews
The All Reviews page shows all historical reviews, use this tab to search for specific reviews or date ranges.
Analytics
The Reviews Analytics tab consolidates all your review data to help you understand the impact of review responses and overall trends inyour location's performance.
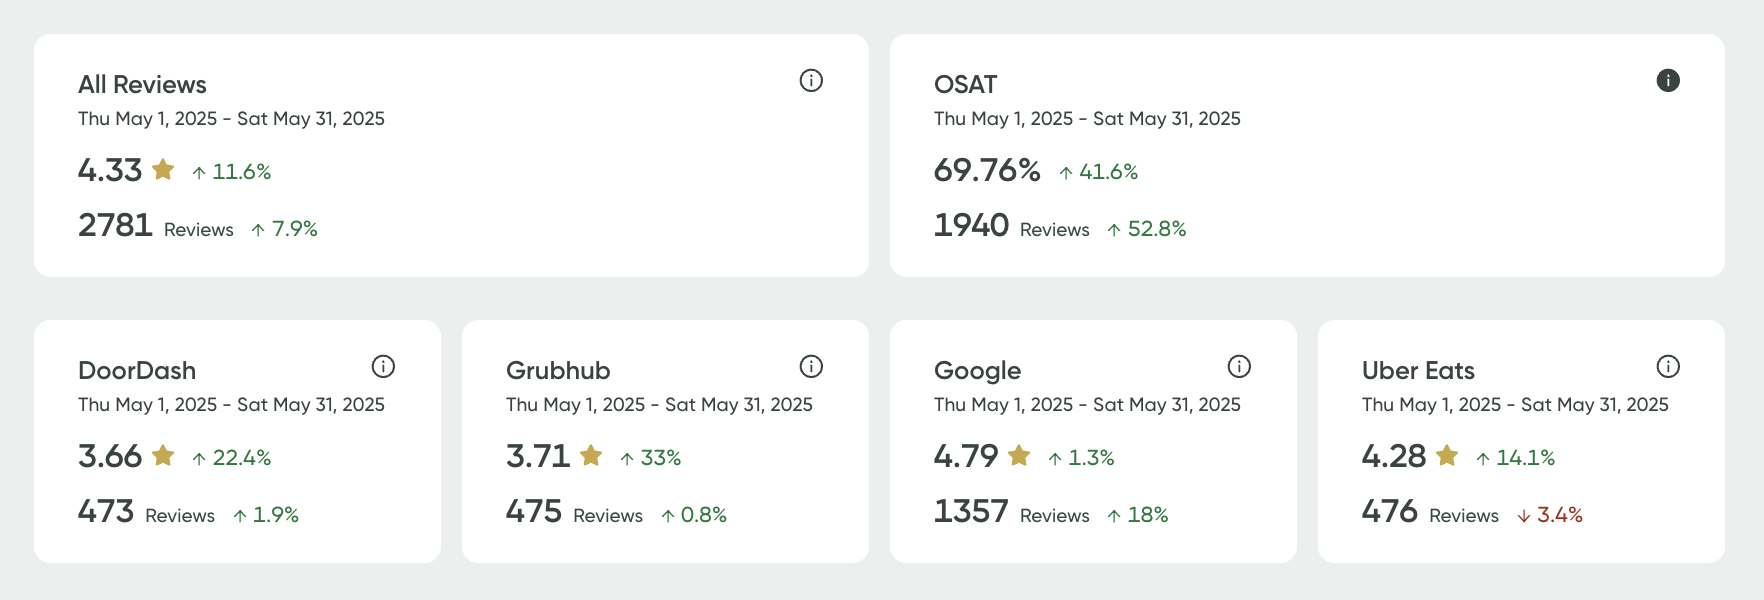
Use the Location Summary table to view ratings by platform and the table can be sorted by any column provided to better understand which locations need the most attention.

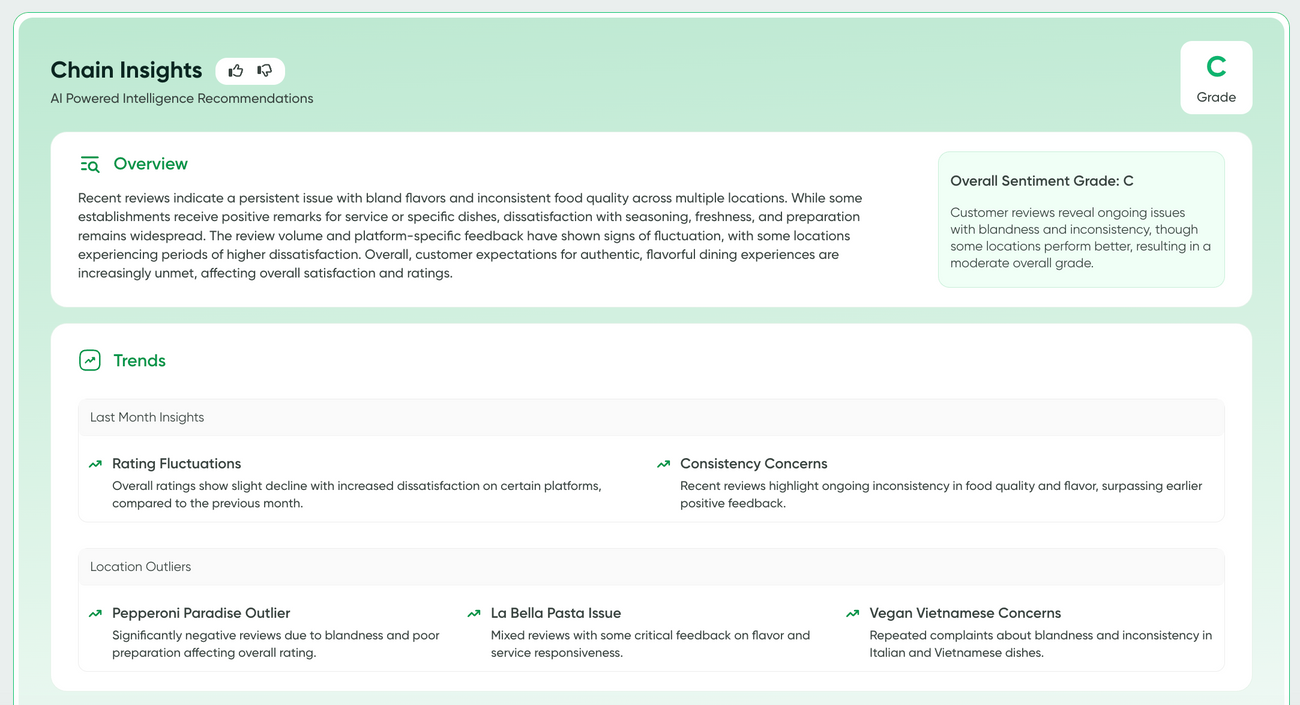
Insights
The Insights tab provides a digestible view of written feedback from customers, starting with the Brand Summary. There will be a brand grade followed by a summary of how the last 30 days have gone and any location outliers that need attention.
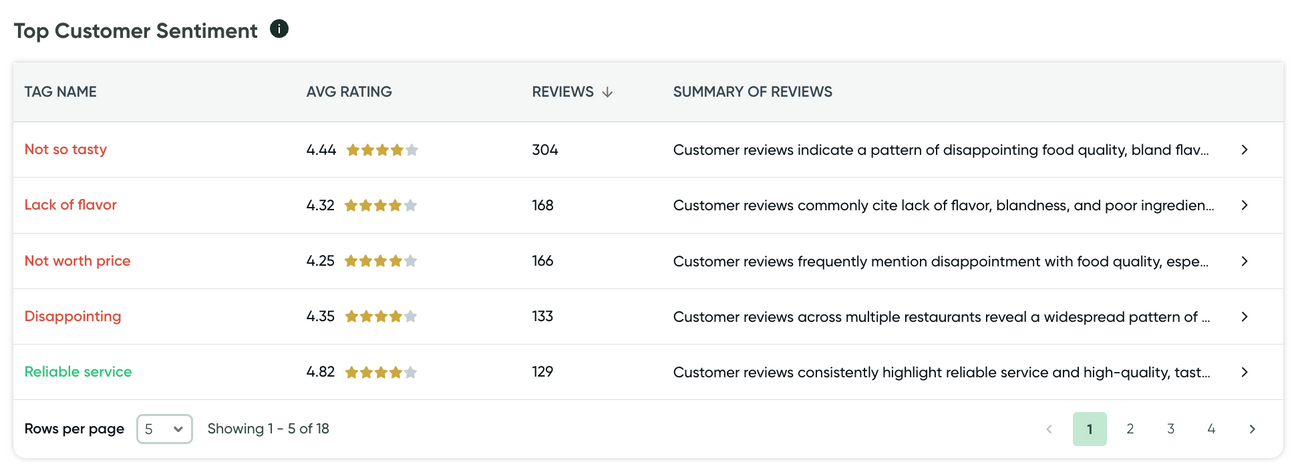
Scroll further down to utilize the sentiment tables -- these tables are great when looking for trending issues across multiple locations.
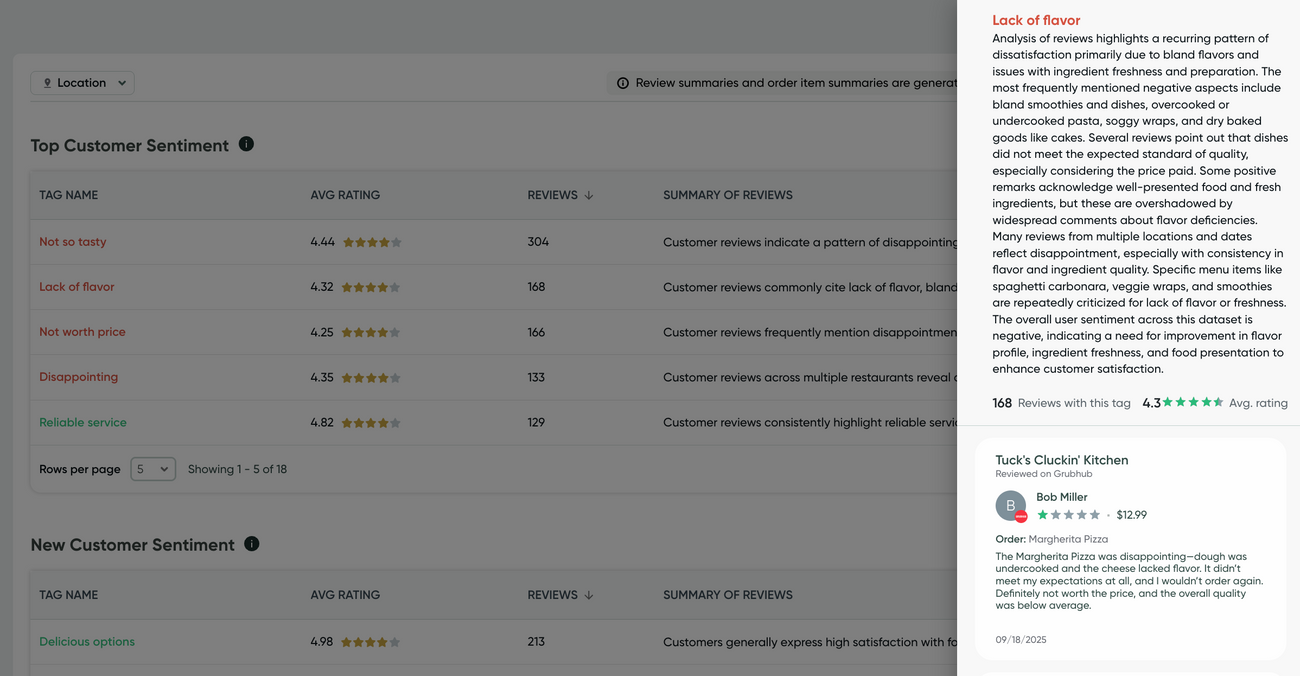
Each sentiment tag can be selected to view a sentiment summary along with review specifics from customers. Scroll farther down on the sidebar to review all detailed customer feedback with the selected tag.
Templates
Templates allow you to create automatic responses to customer reviews based on several criteria (such as location and rating). Visit the Configuring Review Templates help page to best set up templates for your business.
Brand Voice
Brand Voice allows you to customize the tone of any AI-generate responses to reviews. You can create one voice for all your locations, our unique voices for each location.
To create a new brand voice, click on +Add New in the upper right corner. For definitions and step by step please visit the Configuring Brand Voice help page.